In one of my recent videos I share how I shot with the 4×5 instant back (Lomograflok ) from Lomography. In that video I shot with my Chamonix 4×5 camera and I mentioned that we need to use a spacer every time we compose a shot.
That is to take into account of the different film plane on this back. The Instax Wide film plane is further away by 19.4mm from the usual sheet film plane. Another point I mentioned is that if I were to mount this back on the camera, I would need to remove the ground glass frame. The Chamonix ground glass frame is easy to put back ( one hand to slide the frame in)but difficult to remove ( you need 2 hands to lift out the 2 spring arms) and that is kind of troublesome if you have to do that for every shot.
So I decided to 3D printed a ground glass frame that already has the spacer built in and it’s also much easier to remove and put back. The new ground glass frame that I 3D printed is very similar in size to the spacer that came with the back. The only difference is the height which is about four mm higher to take into into account where the ground glass should be. The other thing I added was the grooves along the long sides so that it can be locked down. In contrast, there is no groove on the original spacer because will be held in place when you insert it into the groundglass frame
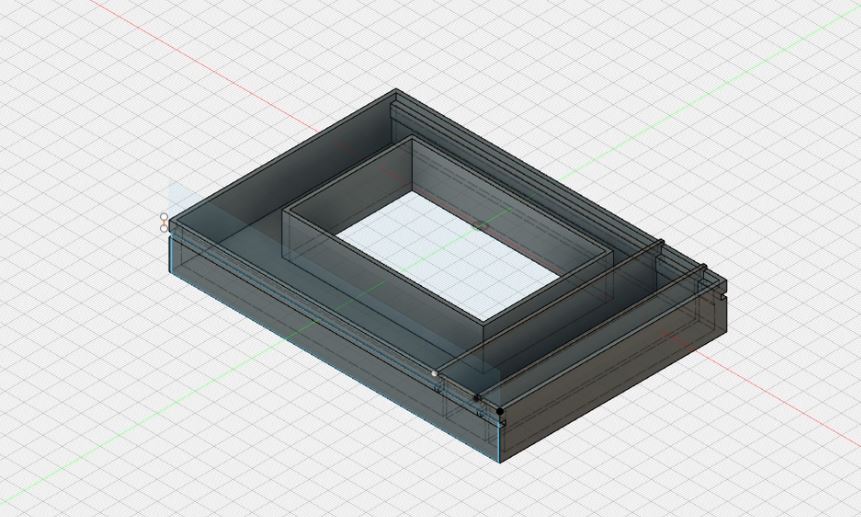
The 3D design is done in Fusion 360, nothing too complicated as the shape is quite regular. It is a matter of measuring the original spacer and transferring the measurements into the design. One of the thing is I nearly missed out are the 2 raised bars on the right side of the frame. These are used to align the entire frame on the camera back to prevent it from being inserted too much or too little.
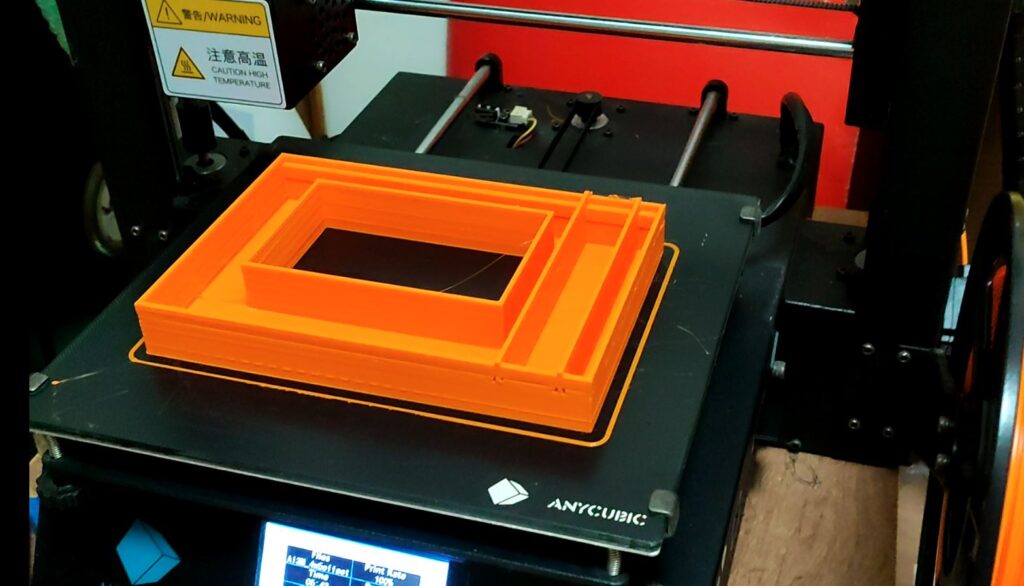
I 3D printed it using my Anycubic Mega S printer with the following specs (for reference):
Layer : 0.3mm
Infill density : 20%
Extruder temp : 230C
Support : Everywhere
Time Taken : 5hrs
The STL files can be downloaded here ( DO note this is a Work in Progress project)
Ground Glass
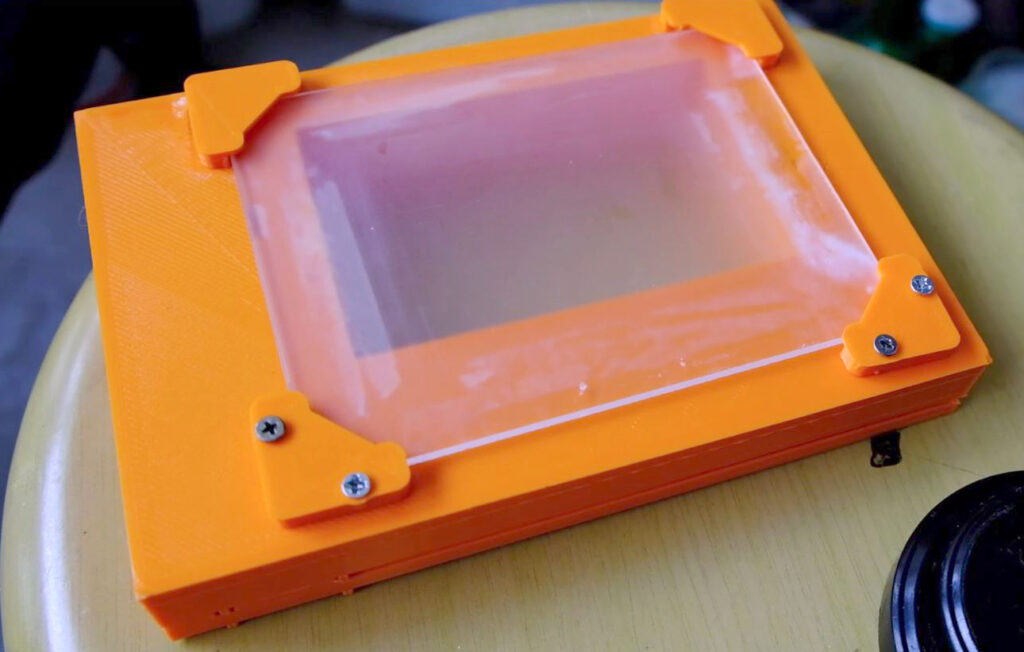
Instead of making my own ground glass, I opted for a piece of 3mm acrylic that is frosted on one side. I have a piece lying around from my Afghan Box cameras build so I decided to use it. There are also four corners that I used to hold the ground glass in place. The 2 bottom pieces are glued to the main body using superglue while the other 2 are secured with screws. This will make it easier to swap ground glass in the future by unscrewing the top 2 pieces.
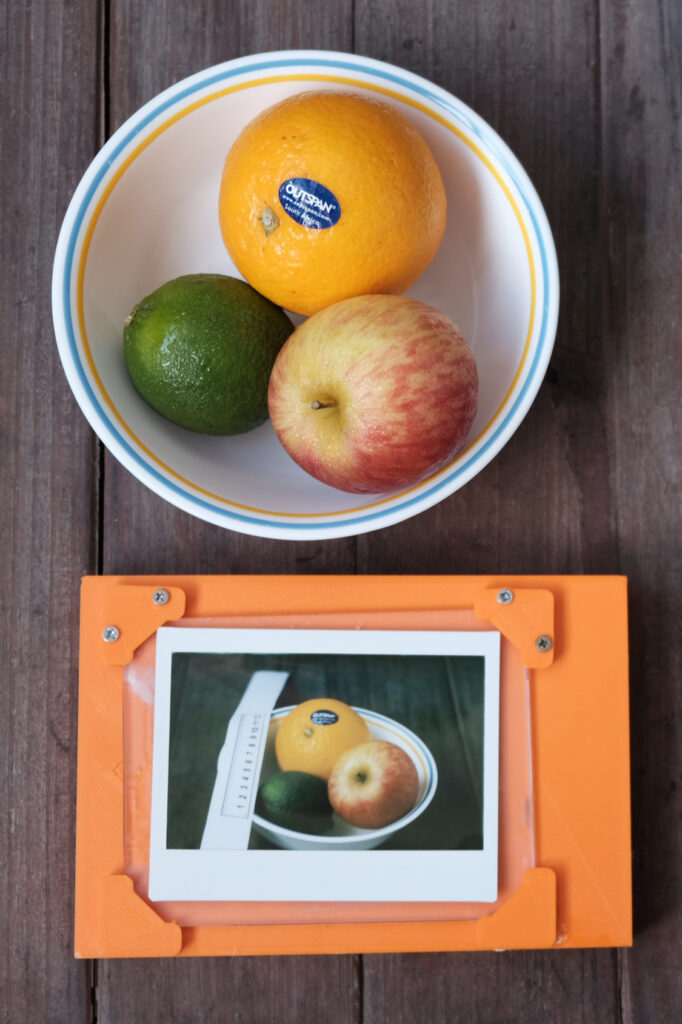
Test shoot
So what was left is to do a test shoot to make sure the ground glass image plane is the same as the Instax Wide back film plane. I chose a still life setup and focused on the label on the orange. The results shown the there is no shift in focus switching from ground glass to instant back.
Improvements
The radial locks to catch the groove are not well aligned. Although the 3D frame is still held in place, it is something to look into.
Conclusion
While the 3D printed back is not perfect, it certainly make using the instant back easily with my Chamonix camera. Other 4×5 cameras may not require this if the back can be slotted under the ground glass.
Pingback: How I 3D Printed a Ground Glass Back for My LomoGraflok 4×5 Instant Back | PetaPixel